
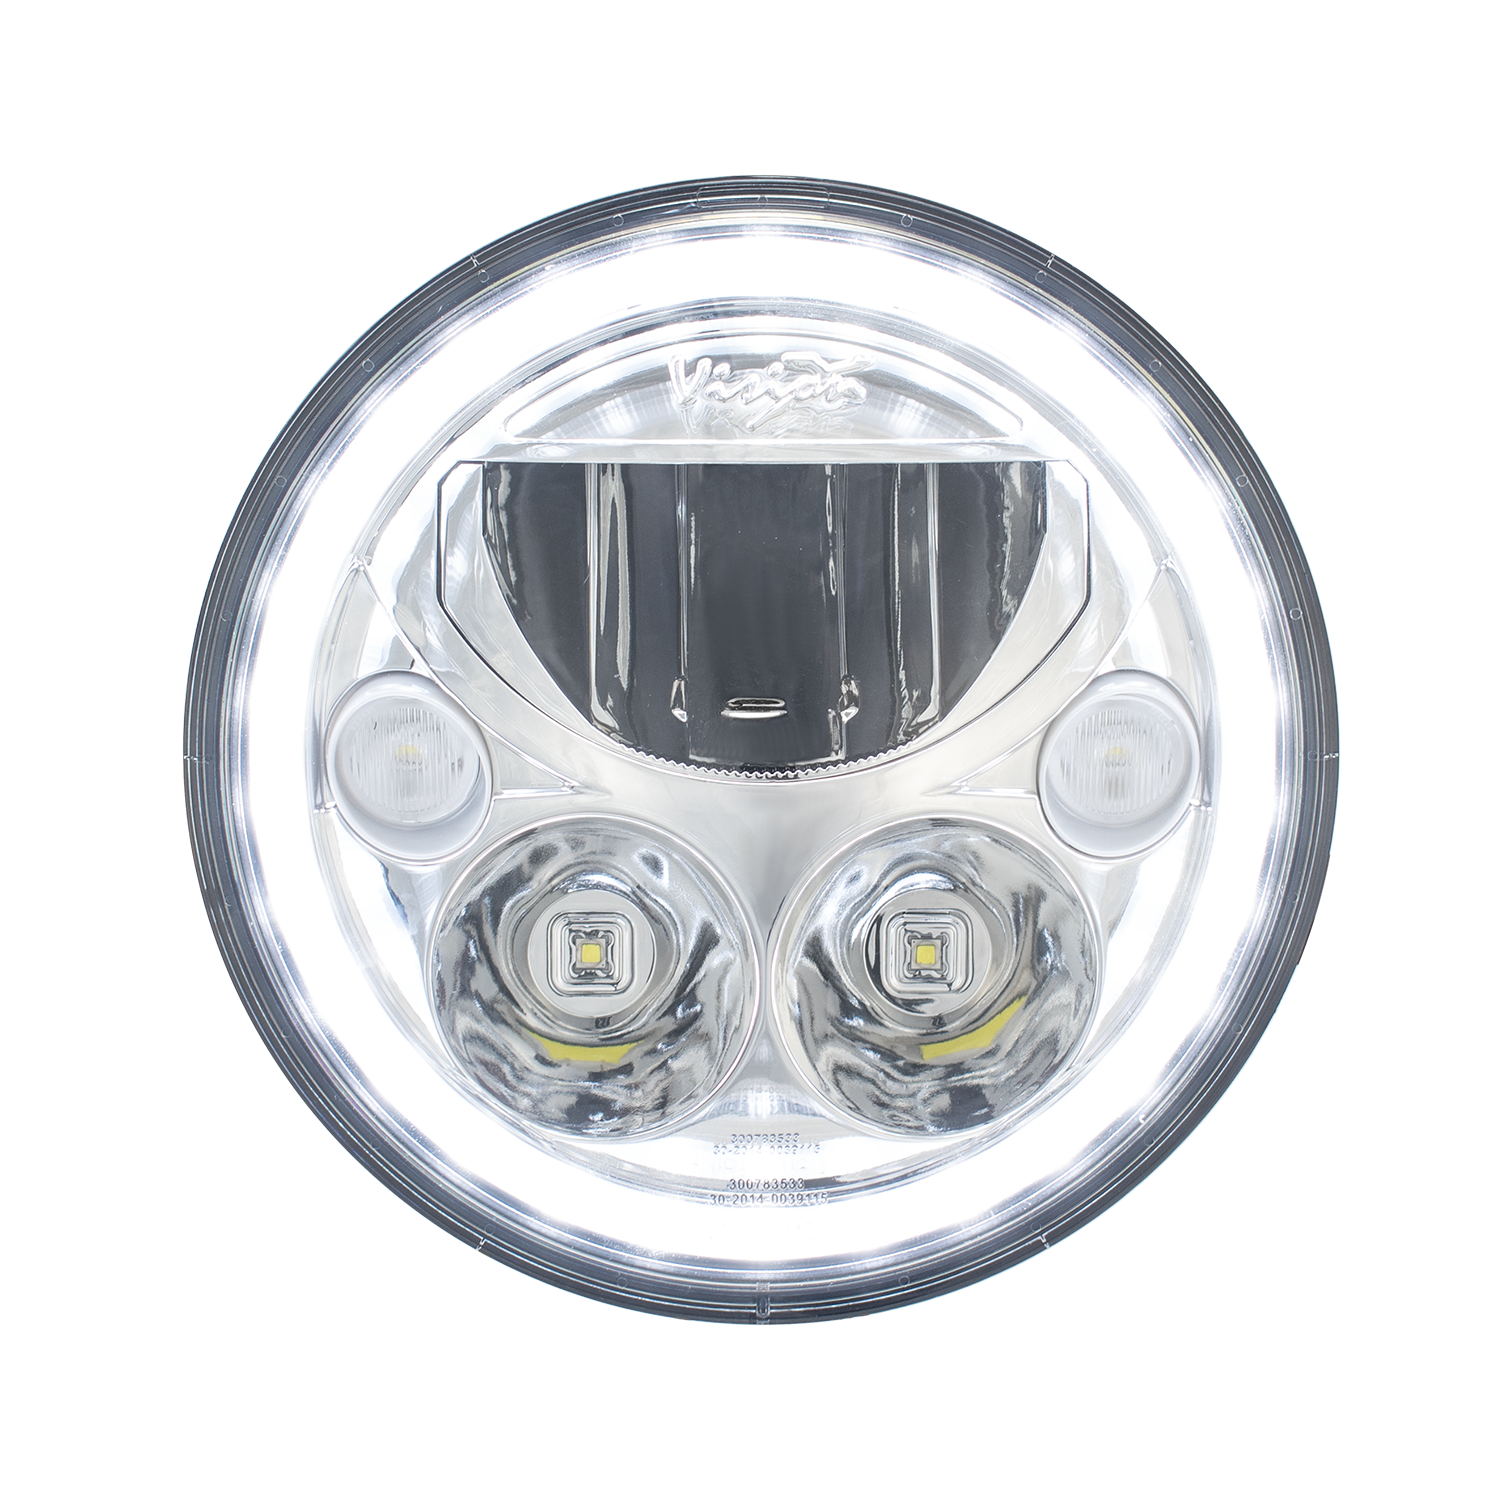


XMC-7RD Installation Instructions
7” XMC SERIES SPECIFICATIONS
1. Warranty : Extended
2. Amp Draw : High 1.5A / Low 1.1A / Halo 0.17A @ 12V
3. Approval : DOT
4. Beam Patterns : High, Low, Halo
5. LED Lifespan : 50,000 Hours
WARNING: Due to excessive light amount you may need to bring your light into a dealer to get it properly adjusted. Weight and tire pressure can affect the position of the light
WARNING: Disconnect battery cables before starting the install to prevent vehicle start-up or accidental turning on of anything electrical, which could cause death or serious injury.
WARNING: Disconnect negative battery wire first. If positive wire makes contact with ground wire connected, the resulting sparks can cause a battery explosion, which could result in death of serious injury.
WARNING: An additional step to prevent accidental electrical shock, which could cause death or serious injury, remove main fuse before proceeding. Follow the instructions in the service manual to disconnect the battery cables, negative (1) cable first or remove the main fuse.
WARNING: After installing seat, pull upward on seat to be sure it is locked in position. While riding, a loose seat can
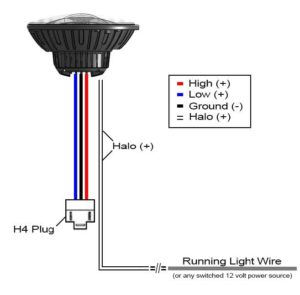
HALO WIRING INSTRUCTION
1. Disconnect vehicle battery prior to installation
2. Review your vehicle manual for detailed instructions for removing existing factory head light housing.
3. Attach XMC LED Headlight to existing factory plug and re-install according to your vehicles manual.
4. To wire the LED Halo Daytime Running light, locate the white wire on the back of the XMC light. Power the white wire by attaching it to the accessory power of the vehicle if there isn’t accessory power available affix it to the blue wire of the XMC.
XMC-7RD WIRING DIAGRAM
WARNING: Some PRE 2014 HD Touring models with batwing fairing, the inner rear hole on the bucket may need to be enlarged slightly for the XMC heat sink to fit. This is only if you experience a gap between the light and the mounting ring. If your light bucket should need to be modified, please follow the steps below:
1. Start by removing the complete mounting assembly from the fairing by removing the 5 screws first.
2. Using a file or preferably a Dremmel tool, remove about 1 mm of metal from the complete circumference of the opening of the rear of the bucket.
3. Test fit after the initial run to see where additional modification may need to be made.
4. When there is no gap left in the Key opening in the mounting ring and the key tabs on the headlight fitment is good.
5. Remount the mounting ring to the Fairing and continue the standard installation of
headlight